Discount Garage Door | Garage Door Repair and Installation

Discount Garage DoorAuthor Archives

Garage Door Panel Replacement: When It Makes Sense

When a garage door panel gets dented – from a vehicle backing into it, a hail storm, or an impact from equipment – the instinct is to wonder whether you have to replace the whole door. Sometimes you do not. Individual panel replacement is a real option in the right circumstances, but several factors determine whether it is practical. Here is how to think through it.

How Garage Door Panels Work

Most residential garage doors are sectional – they consist of four to six horizontal panels stacked on top of each other, connected by hinges. Each panel rides in the tracks independently. This construction means that a damaged section can, in theory, be swapped out without replacing the entire door. In practice, whether that is feasible comes down to availability and economics.

When Panel Replacement Makes Sense

Individual panel replacement works best when:

  • The damage is limited to one or two panels. Replacing a single damaged section is straightforward if matching panels are available. Damage distributed across three or more sections usually shifts the math toward full door replacement.
  • The door is relatively new. Panels from doors manufactured within the last several years are more likely to still be available from the manufacturer. The older the door, the harder it is to find an exact match.
  • The rest of the door and hardware are in good condition. Replacing a panel on a door with worn springs, aging rollers, and a 15-year-old opener only extends the life of a system that will need full attention soon anyway.
  • The damage is cosmetic rather than structural. A dent or crease that does not compromise the panel’s rigidity is a candidate for replacement. A panel that is bent significantly enough to affect how the door tracks and seals may create ongoing problems even after replacement.

When Full Door Replacement Makes More Sense

Full replacement becomes the better call when:

  • Matching panels are not available. If your door model has been discontinued or the specific color and texture combination is no longer produced, any replacement panel will look noticeably different. A patchwork door with mismatched sections has worse curb appeal than simply starting fresh.
  • Hail damage is widespread. A hail storm that leaves dozens of dents distributed across every section affects the entire door’s structural integrity and insulation performance, not just one area. Insurance claims for hail damage typically cover full replacement when damage is this extensive.
  • The door is old. On a door older than 15 years, replacing one panel while the others continue aging means you will likely be revisiting the decision within a few years anyway. New door installation often makes more financial sense over a 5-year horizon.
  • The repair cost approaches a significant fraction of a new door. If replacement panels need to be sourced, shipped, and installed – especially on a less-common door model – the parts and labor cost can approach 40 to 60 percent of a new door installation. At that point the economics of a full replacement are hard to ignore.

The Matching Problem

The biggest practical obstacle to panel replacement is finding an exact match. Garage door manufacturers discontinue models and color lines regularly, and even an in-production panel can differ slightly from the one it is replacing if the finish or steel gauge has changed over the years. Before committing to panel replacement, a technician should confirm availability. This usually requires the door’s model number (typically on a label on the inside of one of the panels or on the top section) and the manufacturer name.

On Oklahoma homes, hail damage is the most common reason panels need replacement. If you are filing an insurance claim, getting a professional assessment of whether matching panels are available – and documenting it in writing – is an important step before settling with the adjuster.

What Panel Replacement Involves

The process:

  1. Identify the door model and manufacturer and confirm panel availability
  2. Order the matching section – lead times vary from same-day local stock to several weeks for special orders
  3. Disengage the opener and release spring tension before removing the damaged panel
  4. Disconnect the hinges attaching the damaged panel to its neighbors
  5. Remove rollers and brackets from the damaged section and transfer them to the new panel
  6. Install the new panel, reconnect hinges, and re-tension the spring system
  7. Test the door through several cycles and verify the opener force settings

Garage Door Panel Assessment in Tulsa and OKC

Discount Garage Door can assess whether your damaged door is a candidate for panel replacement or whether full replacement is the smarter call – and provide documentation suitable for insurance claims when storm damage is involved. Give us a call or request a quote online.

Get a free quote online or call your nearest location:


Related: Garage Door Hail Damage in Oklahoma | Knowing When to Replace Your Garage Door | Residential Garage Doors
Garage Door Opener Installation: What to Expect

Whether your current opener has finally given out or you are upgrading to get modern safety features and smartphone connectivity, a new garage door opener installation is one of the more straightforward home improvements to get done. Here is what to know before you commit: the types available, how to choose, and what the professional installation process actually looks like.

The Four Main Types of Garage Door Openers

Opener type primarily affects drive mechanism, noise level, and where the motor unit sits:

  • Chain drive – the most common and least expensive type. A metal chain drives the trolley that moves the door. Reliable and durable, but the chain creates significant noise and vibration. A reasonable choice for detached garages; less ideal when the garage is directly below a bedroom.
  • Belt drive – uses a rubber belt instead of a chain for a quieter, smoother operation. More expensive than chain drive but the preferred choice for attached garages with living space above. The performance difference is noticeable.
  • Direct drive – the motor itself travels along a stationary chain to move the door. Only one moving part means minimal maintenance and very quiet operation. Typically priced above belt drive.
  • Jackshaft – mounts on the wall beside the door rather than on the ceiling, with a drive mechanism that turns the torsion spring shaft directly. Ideal for garages with high ceilings, low clearance, or ceiling storage that makes a ceiling-mounted unit impractical. Higher cost but solves problems the other types cannot.

What to Look for When Choosing an Opener

Beyond drive type, a few specifications matter:

  • Motor horsepower: a 1/2 HP motor handles most standard residential doors. One-car steel doors and lighter doors are well-served by 1/2 HP. Heavier two-car doors, insulated doors, and wood doors benefit from 3/4 HP or higher. Oversizing slightly is better than undersizing.
  • Rolling code technology: any opener purchased today should use rolling codes, which generate a new encrypted signal with every button press. Older fixed-code openers are vulnerable to signal interception. Rolling codes are standard on all current models.
  • Battery backup: powers the opener through power outages. Particularly relevant in Oklahoma, where ice storms and severe weather can knock out power for hours or days. Not all models include it as standard – worth confirming before purchase.
  • Smart connectivity: Wi-Fi enabled openers allow smartphone monitoring and control, send open/close alerts, and integrate with smart home systems. Useful if you regularly need to let people in or want to confirm the door is closed remotely.
  • Safety reversal: all openers sold today include auto-reverse sensors, required by federal law since 1993. Verify the sensors are included and that the installation includes proper alignment and testing.

Compatibility With Your Existing Door

Not every opener is compatible with every door. Key compatibility factors:

  • Door weight: confirm the opener’s rated capacity covers your door’s actual weight, especially if you have added insulation to an older door
  • Ceiling height and clearance: standard rail lengths cover most residential applications, but low-clearance headers and very high ceilings require specific hardware
  • Existing wiring: if you already have wiring for a wall button and sensors, a technician can often reuse it; new wiring adds some time to the installation
  • Spring condition: an opener should not be installed on a door with worn or broken springs. The opener is not rated to compensate for a spring system that is not doing its job – a technician will typically flag spring condition during an opener installation

What Professional Opener Installation Involves

A professional installation typically runs 1.5 to 3 hours depending on whether wiring needs to be run and whether any other door hardware needs attention:

  1. Remove the existing opener (if replacing) and clear the rail path
  2. Assemble and mount the new rail and trolley
  3. Mount the motor unit to the ceiling with appropriate hardware
  4. Connect the drive to the door’s top section bracket
  5. Run or connect wiring for the wall button and photo-eye sensors
  6. Mount and align photo-eye sensors at floor level on each side
  7. Program remotes, wall button, and keypad
  8. Test auto-reverse: both the pressure sensor and the photo-eye beam
  9. Adjust travel limits and force settings
  10. Demonstrate operation and connectivity setup if applicable

Opener Installation in Tulsa and Oklahoma City

Discount Garage Door installs and services garage door openers from the major manufacturers throughout Tulsa and the Oklahoma City metro. If your opener is failing, outdated, or missing safety features, give us a call or request a quote online – we can typically schedule an installation within a day or two.

Get a free quote online or call your nearest location:


Related: Garage Door Opener Repair and Installation | Garage Door Security Tips | 3 Garage Door Opener Types: How to Choose

What to Do When Your Garage Door Won’t Open

A garage door that will not open is one of the more disruptive things that can happen on a weekday morning. Some causes are trivial – a dead battery in the remote – and some are serious safety issues that mean you should not operate the door at all until it is repaired. This guide walks through the most common causes in order from simplest to check first.

Start With the Obvious

Before assuming a mechanical failure, check the basics:

  • Remote battery: replace it. Cold weather and age drain batteries faster than most people expect. A remote that worked last week can go dead overnight in January.
  • Manual lock: most garage doors have a slide lock or throw latch on the inside. If someone engaged it manually – or if the lock slipped on its own, which happens on older hardware – the opener will strain against a locked door and do nothing.
  • Power to the opener: check that the opener is plugged in and that the outlet has power. A tripped circuit breaker or a cord pulled from the outlet is easy to miss.
  • Disconnect cord: if the red emergency release cord was pulled – intentionally or by accident – the door is disconnected from the opener and will not respond until re-engaged.

Check the Photo-Eye Sensors

Garage door openers installed after 1993 have photo-eye sensors mounted near the floor on each side of the door. If the beam between them is blocked – by dirt on the lens, a cobweb, a misaligned bracket, or something sitting in the path – the opener will not close the door and may prevent it from opening as well.

Look for the indicator lights on both sensors. Both should glow steady. A blinking light means the beam is not aligned or something is interrupting it. Wipe the lenses with a dry cloth, clear the path, and check that both sensors point directly at each other. Most alignment issues can be resolved by loosening the mounting bracket and adjusting by hand.

Broken Spring – the Most Common Mechanical Cause

If the opener runs but the door barely lifts – or the opener sounds like it is straining heavily and the door moves only a few inches – a broken spring is the most likely cause. Torsion springs are mounted above the door on a horizontal shaft. A broken spring is visible as a gap in the coil.

Do not keep trying to operate a door with a broken spring. The opener is not designed to lift the full weight of the door without spring assistance, and forcing it risks burning out the motor and can cause the door to come down hard if the opener releases. Disengage the opener with the red cord and leave the door in place until the spring is replaced.

Broken or Slack Cable

If the door hangs at an angle – one side lower than the other – or if you can see a slack or looping cable along the side of the door, a cable has failed or come off its drum. A door with a failed cable should not be operated. The asymmetric load can cause the door to bind in the tracks or come down unevenly in a way that creates a safety hazard.

Track Obstruction or Damage

Check both vertical tracks for visible dents, bends, or debris. Even a small dent can prevent the rollers from moving freely. If the track is bent from an impact – a vehicle backing into the door frame is a common cause – the door will bind at that point on every cycle. Debris, hardened lubricant, and ice can also create enough resistance to prevent movement.

Do not attempt to force a door past a track obstruction. Straightening a bent track is a professional repair; attempting it with a hammer typically creates a worse problem.

Opener Failure

If the opener makes no sound at all when activated – no hum, no motor noise – the issue is likely in the opener itself: a failed capacitor, a burned motor, or a logic board problem. If the motor runs but the chain or belt does not move, the drive gear inside the opener may have stripped.

Openers older than 15 years that have reached this point are usually better replaced than repaired. The parts cost often approaches the cost of a new unit, and a new opener brings updated safety features and, in many cases, smartphone connectivity.

How to Manually Open the Door in an Emergency

If the opener has failed and you need to get the car out or in:

  1. Pull the red emergency release cord to disengage the door from the opener carriage
  2. Lift the door manually – it should feel balanced and move smoothly if the springs are intact
  3. If the door feels extremely heavy or will not lift at all, stop – a spring is likely broken and the door should not be operated manually without the spring system working
  4. Use the manual lock or a C-clamp on the track to secure the door open while you work in the garage

Emergency Garage Door Repair in Tulsa and OKC

Discount Garage Door provides same-day service throughout Tulsa and the Oklahoma City area with no after-hours surcharge. If your door will not open and the steps above have not resolved it, call us – we can typically have a technician out the same day.

Get a free quote online or call your nearest location:


Related: Garage Door Repair in Tulsa and OKC | Garage Door Spring Repair | Garage Door Cable Repair | The 5 Most Common Garage Door Repair Problems

7 Must-Know Garage Door Safety Tips

Have you ever thought about the potential dangers that come with your garage door? Most people don’t give it much thought until an accident happens or someone gets injured. Most of these injuries happen to children, and some even result in death. The Consumer Product Safety Commission estimates that about 30 thousand people sustain injuries caused by garage doors every year. Most of these accidents are, fortunately, preventable. In this post, we’ll look at seven must-know garage door safety tips… Continue reading »
The Evolution of the Garage Door

The garage door is one of the most frequently used moving parts of any home – and one of the least thought-about. Most homeowners press the button without ever considering that what they are using is the product of more than a century of mechanical and safety engineering. The history of the garage door is actually a fairly direct reflection of American life: it tracks the rise of the automobile, the growth of the suburbs, and the evolving expectations around home safety and convenience.

Before the Automobile: Carriage Houses

What we now call a garage was originally a carriage house – a separate outbuilding where horse-drawn vehicles and tack were stored. 18th and 19th century carriage house doors used simple hinged designs with wooden bracers to distribute weight and add rigidity. These doors swung outward and required clearing a substantial space in front of the building to open. The hardware was designed around durability and weather resistance for structures that saw daily use with heavy vehicles.

The Model T and the Birth of the Garage

Henry Ford’s introduction of the Model T in 1908 changed everything. The automobile moved from luxury item to practical transportation in under a decade, and millions of American households needed a place to store one. By 1906, portable garages were available through Sears mail-order catalogs. Early automobile garages closely resembled the carriage houses they replaced – outward-swinging wooden doors, minimal weatherproofing, and no insulation.

The problem was immediate: outward-swinging doors required clearing a path in front of the garage before you could get the car in or out. In tight urban lots or snowy winters, this was a genuine inconvenience.

The First Sectional and Electric Doors

In 1921, C.G. Johnson invented the first overhead sectional garage door – a door that divided into horizontal sections and rode up a track mounted to the ceiling rather than swinging outward. This solved the clearance problem and allowed garages to be built much closer to the street and property lines. The design was practical enough that its basic principle still underlies virtually every residential garage door built today.

Johnson followed that invention five years later with the first electric garage door operator in 1926. A motorized mechanism could raise and lower the door with the push of a button – an innovation that was genuinely novel at the time, though the technology was primitive by any modern standard.

Attached Garages and Post-War Suburban Growth

The post-World War II suburban housing boom brought a fundamental change: garages moved from detached outbuildings to attached structures integrated into the home’s footprint. This shift made the garage door a prominent feature of the home’s facade rather than a practical structure in the backyard. For the first time, garage door aesthetics started to matter alongside function.

Prosperity in the 1950s also brought larger vehicles – and eventually multiple vehicles – to American households. Garages expanded from single-car to two-car and eventually three-car configurations. Door widths increased, double doors became common, and the hardware supporting heavier doors became more sophisticated.

New Materials Replace Wood

Prior to the 1970s, most residential garage doors were solid wood – durable but requiring regular painting, staining, and maintenance to hold up against weather. The introduction of steel as a primary garage door material in the 1970s and 1980s changed the market significantly. Steel doors were lower-maintenance, more consistent in their dimensions, and adaptable to insulation in ways that solid wood was not. Fiberglass and aluminum followed as options for specific applications – aluminum for coastal environments resistant to salt air corrosion, fiberglass for designs that mimicked wood grain without the maintenance burden.

The 1993 Safety Law

The most consequential regulatory change in garage door history came in 1993, when federal law required all new garage door openers to include automatic reversal systems. Before this requirement, a garage door closing on a child, pet, or object had no safety mechanism to stop it. The requirement mandated photo-eye sensors that reverse the door when the beam path is broken, and pressure sensors that reverse when the door meets resistance. This single regulatory change is estimated to have prevented thousands of injuries and deaths in the decades since.

Smart Technology and What Is Next

The last two decades brought Wi-Fi connectivity to garage door openers, allowing homeowners to monitor and operate their doors remotely from a smartphone. Modern openers send alerts when the door opens or closes, allow remote operation from anywhere, and integrate with smart home systems. Battery backup became standard in higher-end models, addressing the power outage problem that had been a persistent frustration since electric openers became common.

Insulation technology advanced in parallel – modern insulated doors achieve R-values that meaningfully reduce energy transfer through what is often the largest opening in a home’s envelope. Steel and composite construction continues to improve in both durability and design sophistication, with contemporary doors available in styles that closely replicate wood carriage house aesthetics without the maintenance requirements.

Your Garage Door Today

What started as a hinged wooden panel on a carriage house has become one of the most engineered components of the modern home – and one that most homeowners replace only once or twice over the life of a house. Discount Garage Door has been helping Oklahoma homeowners choose, install, and maintain garage doors across Tulsa and Oklahoma City since 2001. If it is time to upgrade yours, we carry a full range of residential doors and can help you find the right fit for your home.

Get a free quote online or call your nearest location:


Related: Residential Garage Doors | Garage Door Opener Repair and Installation | Garage Door Sizes 101

Garage Door Cable Repair: What Homeowners Need to Know

Garage door cables do not get much attention until they fail – and when they do, the result is hard to miss. A broken cable means the door will not lift evenly, will hang at an angle, or will not move at all. Understanding what cables do, why they break, and what the repair involves helps homeowners respond correctly when it happens.

What Garage Door Cables Do

The cables are the load-bearing link between the door and the spring system. On a torsion spring setup, the cables wind around drums mounted at each end of the spring shaft. When the door closes, the spring stores tension; when the door opens, the spring releases that tension through the cables to lift the door’s weight. The cables are under significant load any time the door is in motion – and a door can weigh anywhere from 100 to 400 pounds depending on size and material.

On extension spring systems, a separate safety cable runs through the center of each spring. This cable does not lift the door but contains the spring if it snaps, preventing the broken spring from becoming a projectile.

Signs of a Cable Problem

Cable issues usually give some warning before complete failure:

  • Door hangs unevenly: one side drops lower than the other, causing the door to look crooked in the opening
  • Visible fraying or kinking: the cable shows signs of wear, broken strands, or a bend that does not straighten
  • Slack in the cable: the cable appears loose when the door is closed, looping away from its drum or lying on the floor
  • Door feels unusually heavy: when the opener strains or the door resists manual lifting, a cable may have come off its drum even if it has not broken
  • Loud snap or bang: a cable breaking under tension produces a distinctive noise, often loud enough to startle anyone in the garage

Why Cables Break

The most common causes of cable failure:

  • Worn strands over time: cables are braided steel that fatigues with repeated flexing. Eventually individual strands break and the remaining strands carry more load until failure
  • Spring failure transfer: when a torsion spring breaks, the sudden release of tension can shock-load the cables on that side, causing immediate failure or accelerated wear
  • Forcing a frozen door: attempting to power a door open when it is frozen to the concrete puts extreme stress on the bottom bracket and cables
  • Cable slipping off the drum: loose cable tension, misaligned hardware, or worn drums can cause the cable to slip, creating slack that leads to uneven loading and eventual fraying
  • Age: cables that have never been replaced on a door older than 10 years are operating past their reliable service life regardless of visible condition

Why Cable Repair Is Not a DIY Job

Garage door cables are under high tension any time the spring system is loaded – which is essentially whenever the door is in the closed position. Replacing cables requires releasing that spring tension in a controlled way. For torsion springs, this involves winding bars and a specific sequence that, done incorrectly, can release the spring energy suddenly and violently. Extension spring cables have somewhat lower risk but still involve working around a loaded spring system.

This is the same reason garage door spring replacement carries the warnings it does – the spring and cable system work together, and working on one means managing the other. Professional technicians have the tools and training to do this safely. Homeowners attempting it without experience risk serious injury.

What Professional Cable Repair Involves

A technician will:

  1. Inspect both cables and the drum assembly, not just the side that failed – cables wear at similar rates, so if one has failed, the other is often close behind
  2. Check the springs for wear or damage that contributed to the cable failure
  3. Release spring tension safely before removing the cable from the drum
  4. Install new cable, thread it correctly through the bottom bracket and onto the drum
  5. Re-tension the spring system and verify the door travels evenly and the opener operates within its force limits

In most cases, garage door cable replacement on a residential door can be completed in under an hour. Replacing both cables at the same time adds minimal cost and avoids a second service call when the other side fails.

Garage Door Cable Repair in Tulsa and OKC

Discount Garage Door handles cable repair and replacement throughout Tulsa and the Oklahoma City area with same-day service. If your door is hanging crooked, will not open fully, or you heard a snap from the garage, give us a call – do not keep operating the door until it has been assessed.

Get a free quote online or call your nearest location:

Frayed or Snapped Cable? We Can Be There Today.

Same-day cable repair and replacement across the Tulsa and OKC metros. We replace both cables in one visit, backed by our 5-year warranty – no after-hours or emergency fees.


Related: Broken Garage Door Cable Repair & Replacement | Garage Door Repair in Tulsa and OKC | Garage Door Spring Repair | Why You Should Never Replace Garage Door Springs Yourself

Garage Door Hail Damage in Oklahoma – What to Do

Oklahoma sits in the heart of hail alley. The same storm systems that produce tornadoes also produce some of the largest hail in the country, and a single severe storm can leave visible damage on every exterior surface of a home. The garage door – one of the largest and most exposed exterior elements – often takes the worst of it. Here is how to assess hail damage to your garage door, what your options are, and how the insurance process typically works.

How to Identify Hail Damage on a Garage Door

After a significant storm, inspect the door in good light – either natural light on a clear day or with a work light held at a low angle to reveal shallow dents that are hard to see straight on.

What to look for:

  • Dents and dimpling: Hail impact leaves circular dents in steel panels. Large hail (one inch or more) creates obvious dents easily visible from across the driveway. Smaller hail leaves shallower dimpling that is sometimes only visible in raking light. Note the pattern – hail damage tends to be distributed across the full face of the door rather than isolated to one area.
  • Paint damage and bare metal: Each dent typically chips the paint finish at its center. Bare metal exposed to Oklahoma humidity rusts quickly – sometimes within days. Visible rust forming around fresh dents confirms recent impact damage rather than pre-existing wear.
  • Cracked or shattered panels: Fiberglass and composite panels can crack on impact from large hail. Look for hairline cracks radiating from impact points.
  • Damaged weatherstripping: Hail can crack the bottom seal and side strips, particularly on older rubber that has already hardened from UV exposure.
  • Bent tracks or hardware: In severe storms, debris impacts can bend tracks, brackets, or the top section of the door frame. Check that the door still operates smoothly after a storm – unusual binding or jerking can indicate structural damage beyond the panel surface.

Repair vs. Replace After Hail Damage

Minor hail damage – a few shallow dents, chipped paint – is often a cosmetic issue rather than a functional one. Whether repair or replacement makes more sense depends on the severity, the age of the door, and what your insurance covers.

Repair makes sense when:

  • The damage is limited to a few panels and the door structure is sound
  • Individual panels can be replaced without replacing the full door (this depends on whether matching panels are still available for your door model)
  • The door is relatively new and the opener and hardware are in good condition

Replacement makes more sense when:

  • The damage is distributed across multiple sections – widespread dimpling affects the structural integrity of steel panels and makes matching difficult
  • The door is older and the hail damage is the last straw on a door already showing wear
  • Matching replacement panels are unavailable for your door’s model and color
  • The door’s insulation is compromised – dented insulated panels often lose their thermal efficiency

Filing a Homeowner’s Insurance Claim for Hail Damage

Hail damage to a garage door is typically covered under the dwelling coverage of a standard homeowner’s insurance policy, subject to your deductible. The process generally works as follows:

  1. Document the damage before touching anything. Photograph every dent and damaged section in detail immediately after the storm. Include wider shots showing the full door face and close-ups of individual impact points. Note the date of the storm and save any local weather reports confirming hail in your area.
  2. Get a professional assessment. Contact a garage door professional to inspect and document the damage before making any repairs. Insurance adjusters want to see professional documentation, and a written estimate from a reputable local company carries more weight than photos alone.
  3. File your claim promptly. Most insurers have time limits for storm damage claims. Filing within the first week or two of the storm also makes it easier to link the damage to a specific weather event.
  4. Get the adjuster’s assessment in writing. If the adjuster’s estimate differs significantly from the professional repair or replacement estimate, you can dispute it. Having your own professional documentation makes this process straightforward.

Note: if your deductible is close to or higher than the repair cost, it may not make financial sense to file a claim – claims affect your premiums. Get repair estimates before deciding whether to file.

What to Do Right After a Hail Storm

Even if you plan to file an insurance claim and the repair is weeks away, a few immediate steps protect against further damage:

  • Check that the door still operates correctly – if it is binding, making new noises, or will not open fully, stop using it and call for service
  • Wipe down exposed bare metal with a clean dry cloth and apply a thin coat of clear spray paint or automotive primer to exposed areas to slow rust formation
  • Photograph everything before any weather washes away evidence of the storm

Garage Door Repair and Replacement in Tulsa and OKC

Discount Garage Door has been handling storm damage repairs for Oklahoma homeowners since 2001. We provide written estimates suitable for insurance claims and can typically get a technician out within 24-48 hours following a major storm event. If your door took a hit this storm season, give us a call or request a free quote online.

Get a free quote online or call your nearest location:


Related: Garage Door Repair in Tulsa and OKC | Knowing When to Replace Your Garage Door | Residential Garage Doors

Why Your Garage Door Freezes Shut – and How to Fix It

Oklahoma winters are inconsistent, which makes them especially hard on garage doors. A week of mild weather followed by a sudden ice storm – temperatures dropping 40 degrees in 24 hours – creates exactly the conditions that cause garage doors to freeze shut, move sluggishly, or fail to respond at all. If you have ever pushed the button on a cold January morning and watched nothing happen, here is what is going on and what to do about it.

Why Garage Doors Freeze Shut

The most common cause of a frozen garage door is moisture that collects under the bottom rubber seal and freezes overnight. This happens most frequently after a freeze-thaw cycle: snow or ice melts during a warmer afternoon, water seeps under the seal, and then temperatures drop again after dark, bonding the seal to the concrete. The door will not open because it is literally glued to the floor with ice.

A second common cause is ice forming in the door’s tracks or along the weatherstripping on the sides of the frame. If water has worked its way into those gaps, a hard freeze can prevent the door from moving freely even after it disengages from the floor.

How to Safely Unstick a Frozen Garage Door

Do not just force it. Using the opener to power through a frozen seal risks burning out the motor, breaking the door’s bottom bracket, or tearing the seal itself – creating a gap that makes future freezing more likely. Here is the right approach:

  • Check manually first: Pull the emergency release cord (the red handle hanging from the opener rail) to disengage the opener. Then try lifting the door by hand with firm, even upward pressure. If it breaks free without significant force, the freeze was minor and you are good to proceed.
  • Apply heat to the seal: A heat gun or hair dryer applied along the bottom seal melts the ice bond without damaging the rubber. Work in sections along the length of the door. Do not use an open flame – a propane torch will damage the seal and is a fire risk.
  • Use de-icer or warm water: Apply commercial lock de-icer or carefully pour warm (not boiling) water along the base of the door. Boiling water can crack concrete or cause rapid temperature shock to door components. Follow up immediately with a towel to absorb the water before it refreezes.
  • Do not use excessive force: If the door resists manual lifting after you have addressed visible ice, stop. Forcing it risks broken springs or cables that make the situation significantly more expensive and dangerous.

When the Door Opens but Moves Poorly

Cold temperatures cause metal to contract, which reduces clearance in the tracks and increases friction on every moving part. If your door is sluggish, noisy, or jerky in cold weather without being frozen shut, lubrication is likely the issue. Apply a silicone or lithium-based garage door lubricant to the roller stems, hinge pins, and torsion spring coils. Avoid lubricating the tracks themselves in cold weather – excess lubricant in the tracks can freeze and cause more problems.

If the opener runs but the door barely moves, or the opener sounds like it is straining, the motor is fighting both the cold-stiffened springs and frozen seals simultaneously. Do not run the opener repeatedly in this state – you will burn out the motor. Disengage and operate manually, address the source of resistance, then re-engage.

When the Opener Has Power But Does Not Respond

Cold weather drains batteries faster than warm weather. If your remote stops working on a cold morning, try replacing the batteries first – this is the most common cause of remote failure in winter. Also check the battery in your exterior keypad if you have one.

If the wall button works but the remote does not, the remote needs new batteries or reprogramming. If neither the remote nor the wall button works, check that the opener is plugged in and the circuit breaker has not tripped. An opener that is simply cold but otherwise functional should respond once the garage warms slightly – give it a few minutes after bringing the garage to above-freezing temperatures if possible.

How to Prevent a Frozen Garage Door

A few steps in fall prevent most winter freeze problems:

  • Lubricate the bottom seal: Apply a silicone-based lubricant along the bottom rubber seal in late fall. This reduces adhesion to concrete in freezing temperatures.
  • Check the seal condition: A cracked or hardened seal lets more water under the door and creates more surface area for ice to bond. Replace worn seals before winter.
  • Keep the garage floor dry: Sweep out standing water or snow tracked in by vehicles. The less moisture on the concrete near the door, the less material available to freeze under the seal.
  • Lubricate all moving parts in fall: Springs, rollers, and hinges that are well-lubricated going into winter resist the contraction and friction of cold temperatures much better than dry components.

Need Service After a Freeze?

If forcing a frozen door resulted in a broken spring, bent bracket, or torn seal – or if your door has simply been struggling through winter and needs a professional look – Discount Garage Door provides same-day service throughout Tulsa and the Oklahoma City area. We charge the same rate day or night with no after-hours fees.

Get a free quote online or call your nearest location:


Related: Garage Door Repair in Tulsa and OKC | Getting Your Garage Door Ready for Winter | Garage Door Spring Repair

Garage Door Security Tips

The garage door is the largest opening on most homes – and one of the most commonly overlooked security vulnerabilities. While most homeowners lock their front door without thinking twice, the same careful habits often do not carry over to the garage. Burglars know this. A garage that is easy to access provides shelter while they work, direct entry into the home, and in many cases, access to a vehicle as well. Here are the most effective steps you can take to make your garage a much harder target.

Do Not Leave the Door Open

It sounds obvious but leaving the garage door open for extended periods – while working in the yard, running a quick errand, or just airing it out – is an invitation. An open garage lets anyone passing by see what is stored inside, assess whether anyone is home, and in some cases simply walk in while you are occupied elsewhere. Make closing the door a habit any time you are not actively moving in and out. If you want ventilation, use a side door or window rather than leaving the main door open.

Frost or Cover Windows If You Have Them

Garage door windows add natural light but also give anyone on the street a clear view of what is inside – vehicles, tools, bikes, and seasonal equipment all telegraph both your valuables and your schedule. Frosted window film or privacy cling applied to the inside of the glass maintains the light while eliminating the view from outside. It costs a few dollars and takes an hour to apply.

Use the Lock When You Are Away

Most garage doors have a manual throw latch or slide lock that can be engaged independently of the opener. Get in the habit of using it when you leave for extended trips. For added security, a pair of C-clamps tightened onto the track on each side of the door prevents the door from being forced up even if someone defeats the opener mechanism. The manual lock and clamps together make the door essentially impractical to force from outside.

Treat the Interior Door Like a Front Door

The door from the garage into your home is a secondary line of defense, but many homes have a hollow-core interior door in that location – the same type of door used for bedroom closets. That door would not survive a determined kick for long. Replace it with a solid-core wood or steel door, install a deadbolt, and add an anti-kick plate to the door frame. If someone does get into the garage, this door is the last thing standing between them and your living space.

Add Motion-Activated Lighting

A dark garage exterior makes it much easier for someone to work unnoticed. Motion-activated spotlights covering the driveway and garage approach are inexpensive to install and highly effective as a deterrent – most opportunistic thieves move on when lights come on. Position them so that the entire driveway apron and the approach from both sides of the garage are covered.

Never Leave Your Remote in the Car

A garage door remote clipped to a sun visor is one of the most common oversights in home security. If someone breaks into your car – or if your car is stolen – they have a button that opens your home. Keep your remote on your keychain instead. If your car was broken into and the remote was inside, reprogram your opener immediately to invalidate the stolen remote.

Secure the Emergency Release Cord

Most garage door openers have a red release cord that disengages the door from the opener for manual operation. This cord can be triggered from outside using a thin wire or hook passed through the top of the door frame – a technique that takes seconds and is well-documented online. You can prevent this by threading a zip tie through the hole in the release lever that connects to the cord, which prevents the lever from being tripped externally without preventing your use of it from inside.

Upgrade to a Modern Opener With Rolling Code Technology

Older garage door openers transmit a fixed code every time you press the remote. Code-grabbing devices can capture that signal and replay it to open your door. Modern openers use rolling code technology, which generates a new encrypted code with every button press – making code interception essentially useless. If your opener is more than 15 years old, upgrading to a current model addresses this vulnerability and brings better safety features, quieter operation, and smartphone connectivity at the same time.

Questions About Your Garage Door System?

Discount Garage Door installs and services garage door openers throughout Tulsa and the Oklahoma City area. If you want to upgrade to a more secure modern opener or have questions about any of these security measures, give us a call or request a free quote online.

Get a free quote online or call your nearest location:


Related: Garage Door Opener Repair and Installation | Garage Door Repair | Preparing the Garage for an Emergency

Spring Cleaning Checklist for Your Garage Door

Spring is the right time to give your garage the attention it does not get the rest of the year. After months of winter – road salt tracked in, moisture, temperature swings, and a door that opened and closed through ice storms and cold snaps – a few hours of focused work in March or April gets everything back in order before summer. Here are nine things worth doing while you are out there.

1. Wash the Door Inside and Out

Your garage door accumulates road grime, pollen, insect residue, and oxidation over the course of a year – and in Oklahoma, that includes a full winter’s worth of weather. Wash both sides with warm water and a mild detergent. A soft brush or sponge works for most finishes; avoid abrasive pads on painted steel or wood. Rinse completely and let it dry. Beyond the appearance improvement, washing removes surface contaminants that break down paint and finish over time. The recommendation from most manufacturers is to wash the door twice a year – spring and fall.

2. Check and Replace the Weatherstripping

The rubber seal along the bottom of the door and the strips along the sides take a beating through winter. Check the bottom seal for cracking, hardening, or sections that have torn away from the retainer. Close the door and look for visible daylight at the edges – that gap means weather, insects, and dust are getting in. Weatherstripping is inexpensive and available at any hardware store, and replacing a worn seal takes under an hour. It is one of the highest-impact small maintenance tasks on the door.

3. Lubricate the Moving Parts

Lubricate the torsion spring coils, roller stems, hinge pins, and opener chain or belt with a silicone or lithium-based garage door lubricant. Do not use WD-40 – it evaporates and leaves components dry. Cold weather depletes whatever lubrication was in place last fall, and spring is when you will notice the squeak and stiffness that crept in over winter. Run the door a few cycles after lubricating to distribute the product. This single step prevents most of the noise and wear issues that develop through the year.

4. Tighten All the Hardware

Thousands of open-close cycles slowly work bolts and nuts loose over time. Go through the door with a socket wrench and tighten every piece of hardware you can reach – track mounting bolts, hinge screws, roller brackets, and the lag bolts that mount the opener to the ceiling. Check for any hinges that are visibly worn or cracked and replace them. This takes 15-20 minutes and catches the source of many rattles and squeaks before they become bigger issues.

5. Clean the Tracks

Garage door tracks accumulate grime, old lubricant, and debris that builds up into a coating that causes rollers to drag. Wipe the inside of the tracks with a damp cloth – especially in the curved sections where the door transitions from vertical to horizontal travel. Do not over-lubricate the tracks afterward; clean and smooth is the goal, not slick. If you see visible bends or dents in the track, that is a professional repair – bent tracks cause misalignment that gets worse over time.

6. Add Ceiling or Wall Storage

If your garage floor is crowded with gear you used once last summer and have not touched since, spring is the time to fix that. Move anything you will not use for months – holiday decorations, beach gear, off-season sports equipment – to wall-mounted shelves or overhead ceiling storage racks. Getting things off the floor makes the garage more functional, creates space for projects, and keeps hazardous items like chemicals and tools out of reach of kids and pets. Basic wall shelving and ceiling storage kits are DIY-friendly projects that pay off immediately in usable space.

7. Inspect the Springs and Cables Visually

You do not need to touch anything – just look. On a torsion spring system, check the coil above the door for any visible gap, which indicates a broken spring. Check the cables running along each side of the door for fraying, kinking, or slack. If you see anything that looks off, do not continue operating the door and call for service. A worn cable or broken spring is a repair job for a professional, not a homeowner – but catching it during a visual check is far better than discovering it when the door fails to open.

8. Test the Auto-Reverse Safety Feature

Place a 2×4 flat on the floor in the door’s path and close it. When the door contacts the board, it should immediately reverse. If it does not reverse, or reverses only after pressing down hard, the force sensitivity needs adjustment – consult your opener manual. Also wave your hand through the photo-eye beam path near the floor while the door is closing; it should reverse immediately. Both sensors should show solid indicator lights when the door is closed. If anything fails these tests, have the system serviced before continuing normal use.

9. Paint and Touch Up

Spring is the ideal time to paint – temperatures between 50 and 80 degrees and lower humidity than summer. Walk the door and look for chipped areas, rust spots on steel, or sections where paint has chalked or peeled. Touch up small areas with matching exterior paint and a brush. For steel doors with any bare metal showing, apply a rust-inhibiting primer before the topcoat. Catching these spots in spring prevents them from developing into larger rust or deterioration issues through summer heat and humidity.

Questions About Your Garage Door?

Discount Garage Door handles tune-ups, weatherstripping, spring replacement, and full inspections throughout the Tulsa and Oklahoma City area. If your spring walkthrough turns up something that needs a professional, give us a call or get a free quote online.

Get a free quote online or call your nearest location:


Related: Garage Door Repair in Tulsa and OKC | How to Fix a Noisy Garage Door | Testing Your Garage Door’s Auto-Reverse

Free Estimate
Need garage door help?

Same-day service. No overtime fees. Tulsa & OKC.

Get a Free Estimate → Call Now
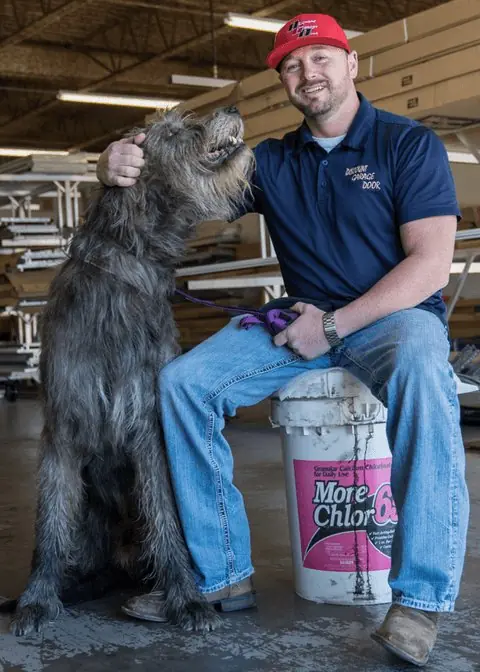
Learn about Jasper the Irish Wolfhound
garage door design center
  • 1205 S Gillette Ave, Tulsa, Oklahoma, 74104
  • 400 Vermont Ave #125, Oklahoma City, Oklahoma, 73108
Discount Garage Door
Residential Garage Doors, Commercial
Garage Doors, Garage Door Openers, Repair,
Overhead Door Repair, Garage Door Repair
Areas of Service
Oklahoma City, Edmond, Norman, Moore, Tulsa, Owasso, Yukon, Broken Arrow, Claremore, Central Oklahoma, Sapulpa, New Tulsa, Jenks, Glenpool, Prattville, Sand Springs, Leonard, Coweta, Kiefer, Oakhurst, Inola, Fair Oaks, Verdigris, Lotsee, Sperry, Justice, Valley Park, Bixby, Mannford, Cleveland, Westport, Prue, Bethany, Midwest City, Spencer, Newcastle, Harrah, Jones, Piedmont, Arcadia, Luther, Wellston, Dell City, Tuttle, Bridge Creek, Blanchard, Mustang, Noble, Goldsby

*Ask a technician for written warranty, lowest price guarantee, and a list of complete details. Restrictions Apply.